Event Mobile Apps for Barcode and QR Code Ticket Scanning and Check-in or Check-out Attendance Tracking
Our event mobile apps are offered by our sister platform Event Espresso. You can use the mobile apps to scan QR codes, bar codes, and check-in or check-out attendees to track attendance.
An active subscription for the Registration Check-in feature upgrade is needed to check-in guests on your Event Smart website.
It is also included in the personal or business plans. Want to upgrade to one of these plans? Make the switch from your My Account page on EventSmart.com.
Requirements:
- Apple: iOS version 9+
- Android: KitKat version 4.1+
- Scan Tickets & Check-in Attendees upgrade for check-in/out by name or scanning bar/
qr codes
Optional:
- Customized Printable Tickets - to create custom ticket designs for each event.
Installation for Apple Devices
The Event Espresso (EE4) app can be downloaded and installed on your iPad and iPhone devices from the iTunes store:

Logging in
1. Once the app is installed on your iOS device, click on the "Event Espresso" icon.

2. Enter your Event Smart credentials into the login screen.
- Website URL: This is your Event Smart website
- Login ID: This is your username or email address
- Password: This is your password

Scanning Tickets
You have two options when scanning tickets. You can scan tickets for a specific event or any event. Please note, the Scanning & Check-in upgrade is required for scanning tickets.
Scanning tickets for a specific event:
Click the "Scan" button in the top-right corner of the selected event screen to start scanning tickets for that event.
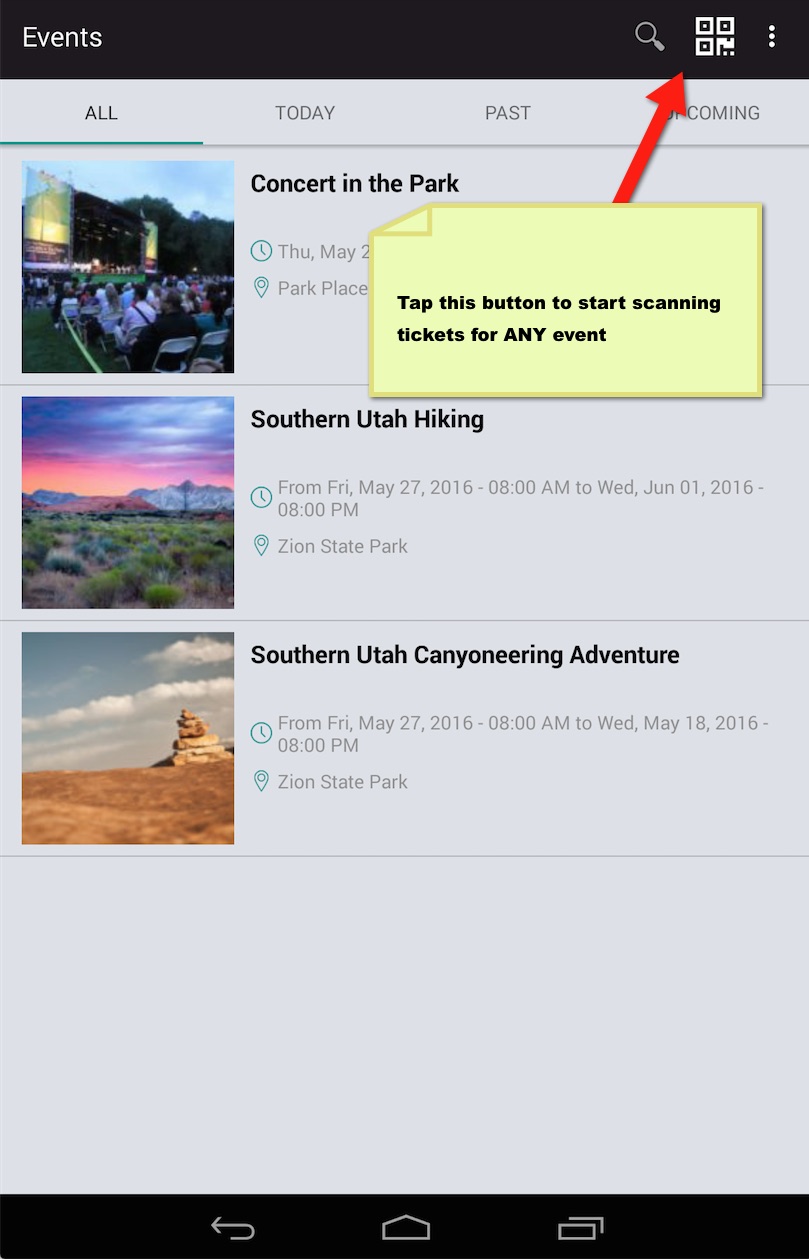
Scanning tickets for ANY event:
Click the "Scan" button in the top-left corner of the screen to start scanning tickets for an event.

Next, you will see the "Camera View" within a modal window when the "Scan" button is pressed. Just place the device's camera over the ticket, centered above the Barcode or QR code:
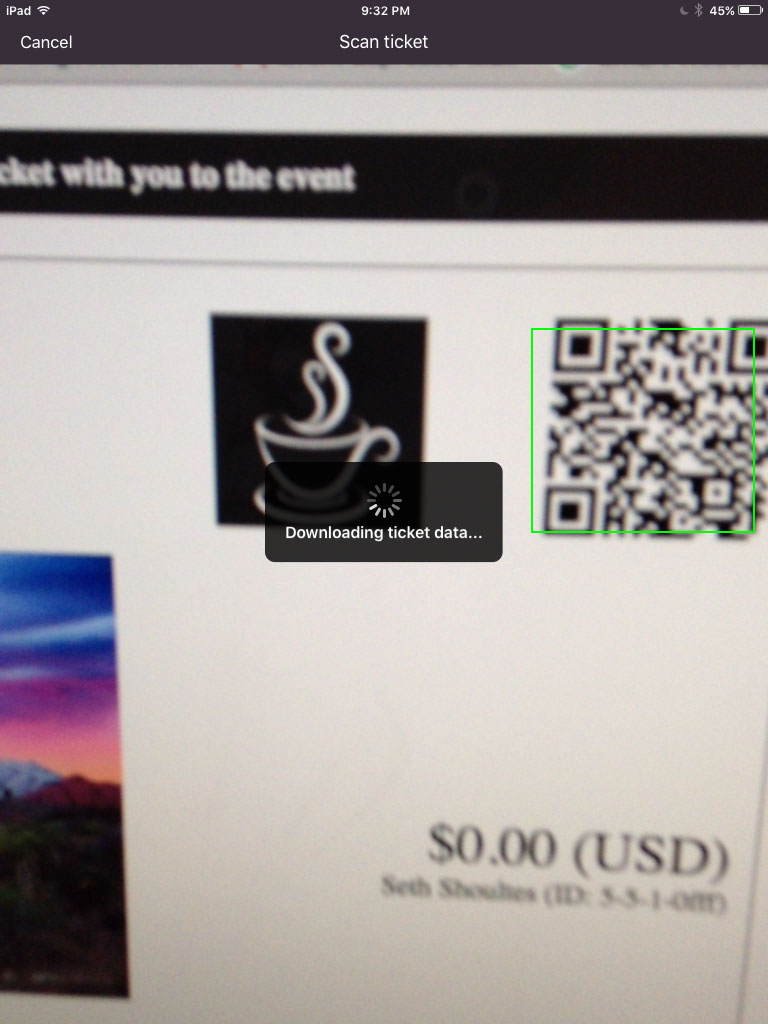
When a ticket is successfully (or unsuccessfully) scanned, the camera view will change to show the info about the attendee and display a green (or a red) image:

Manually Tracking Attendance
Manually Checking In/Out Attendees
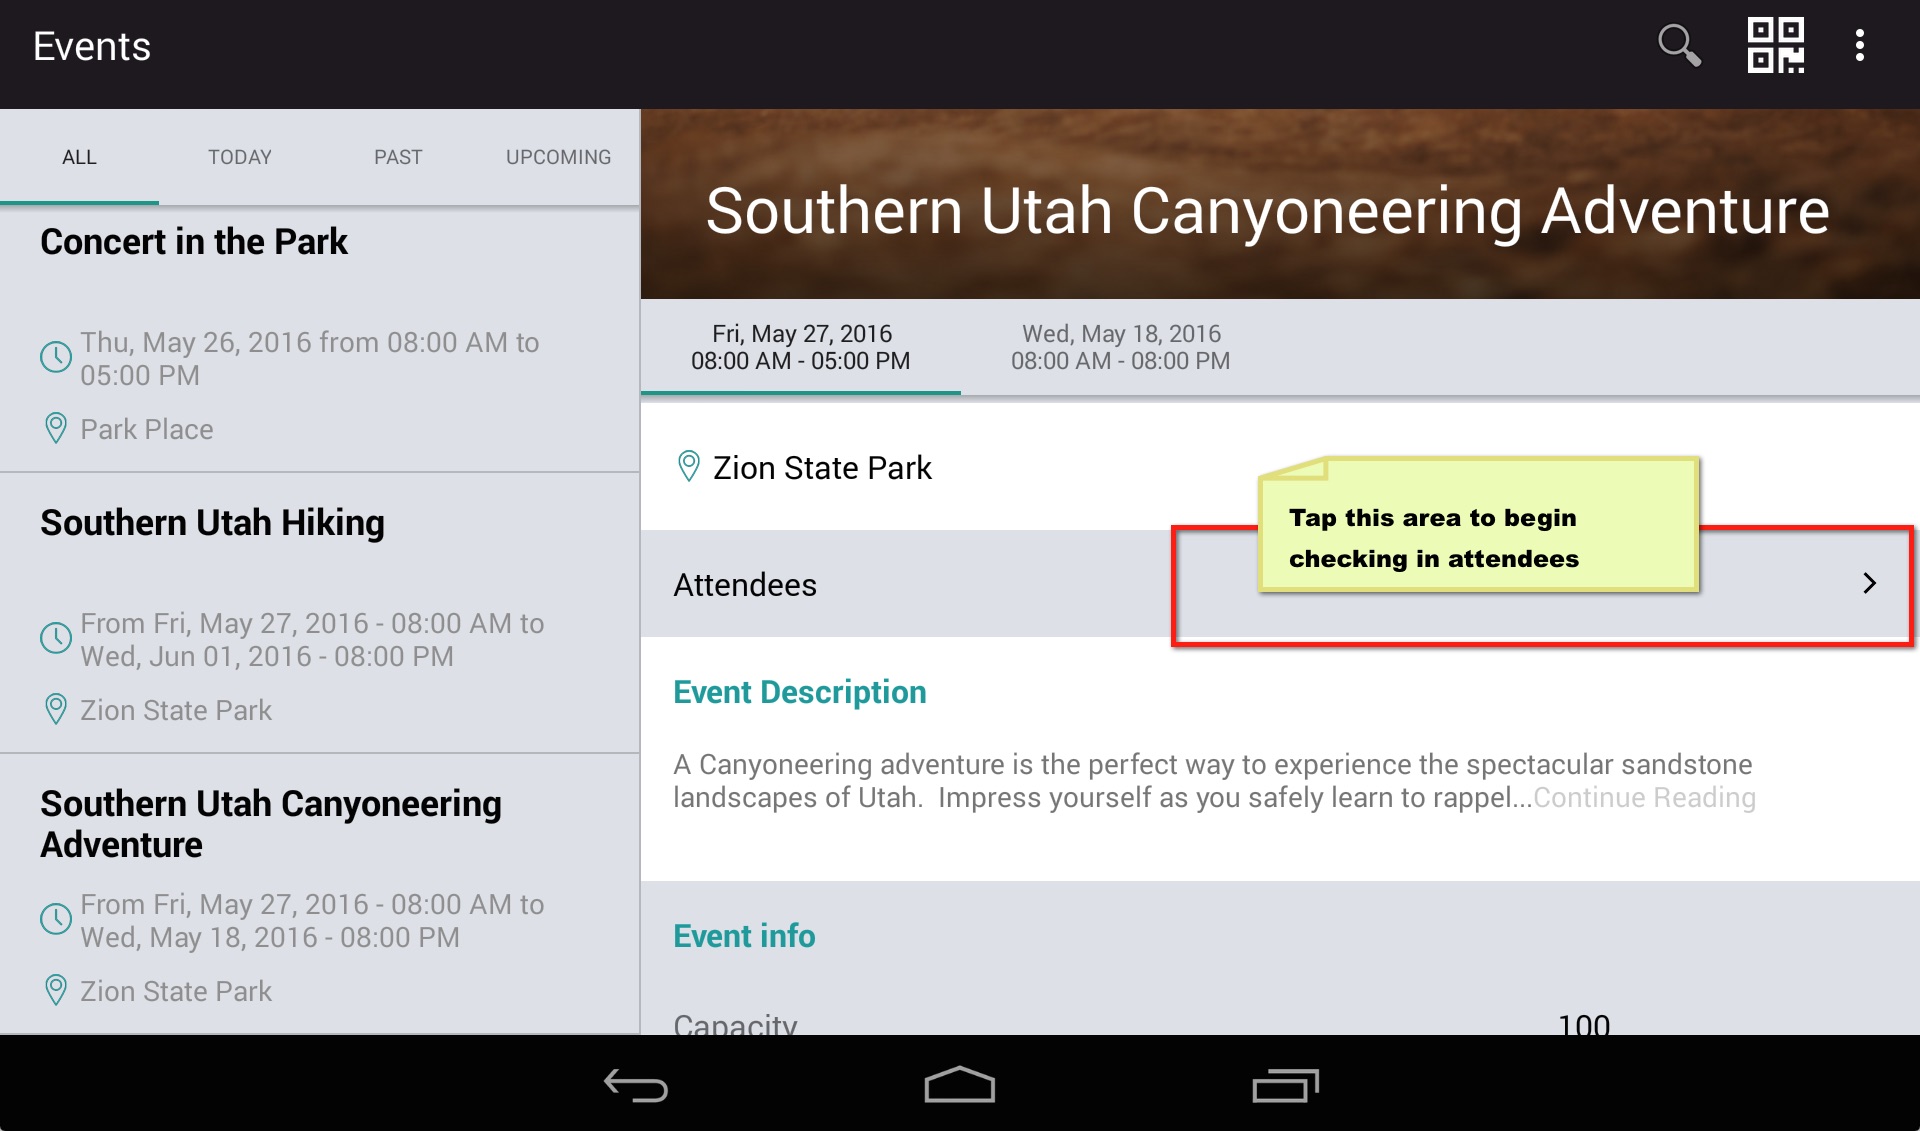
1. From the Event Overview Screen, tap the "Attendees" row to view the list of registrations:

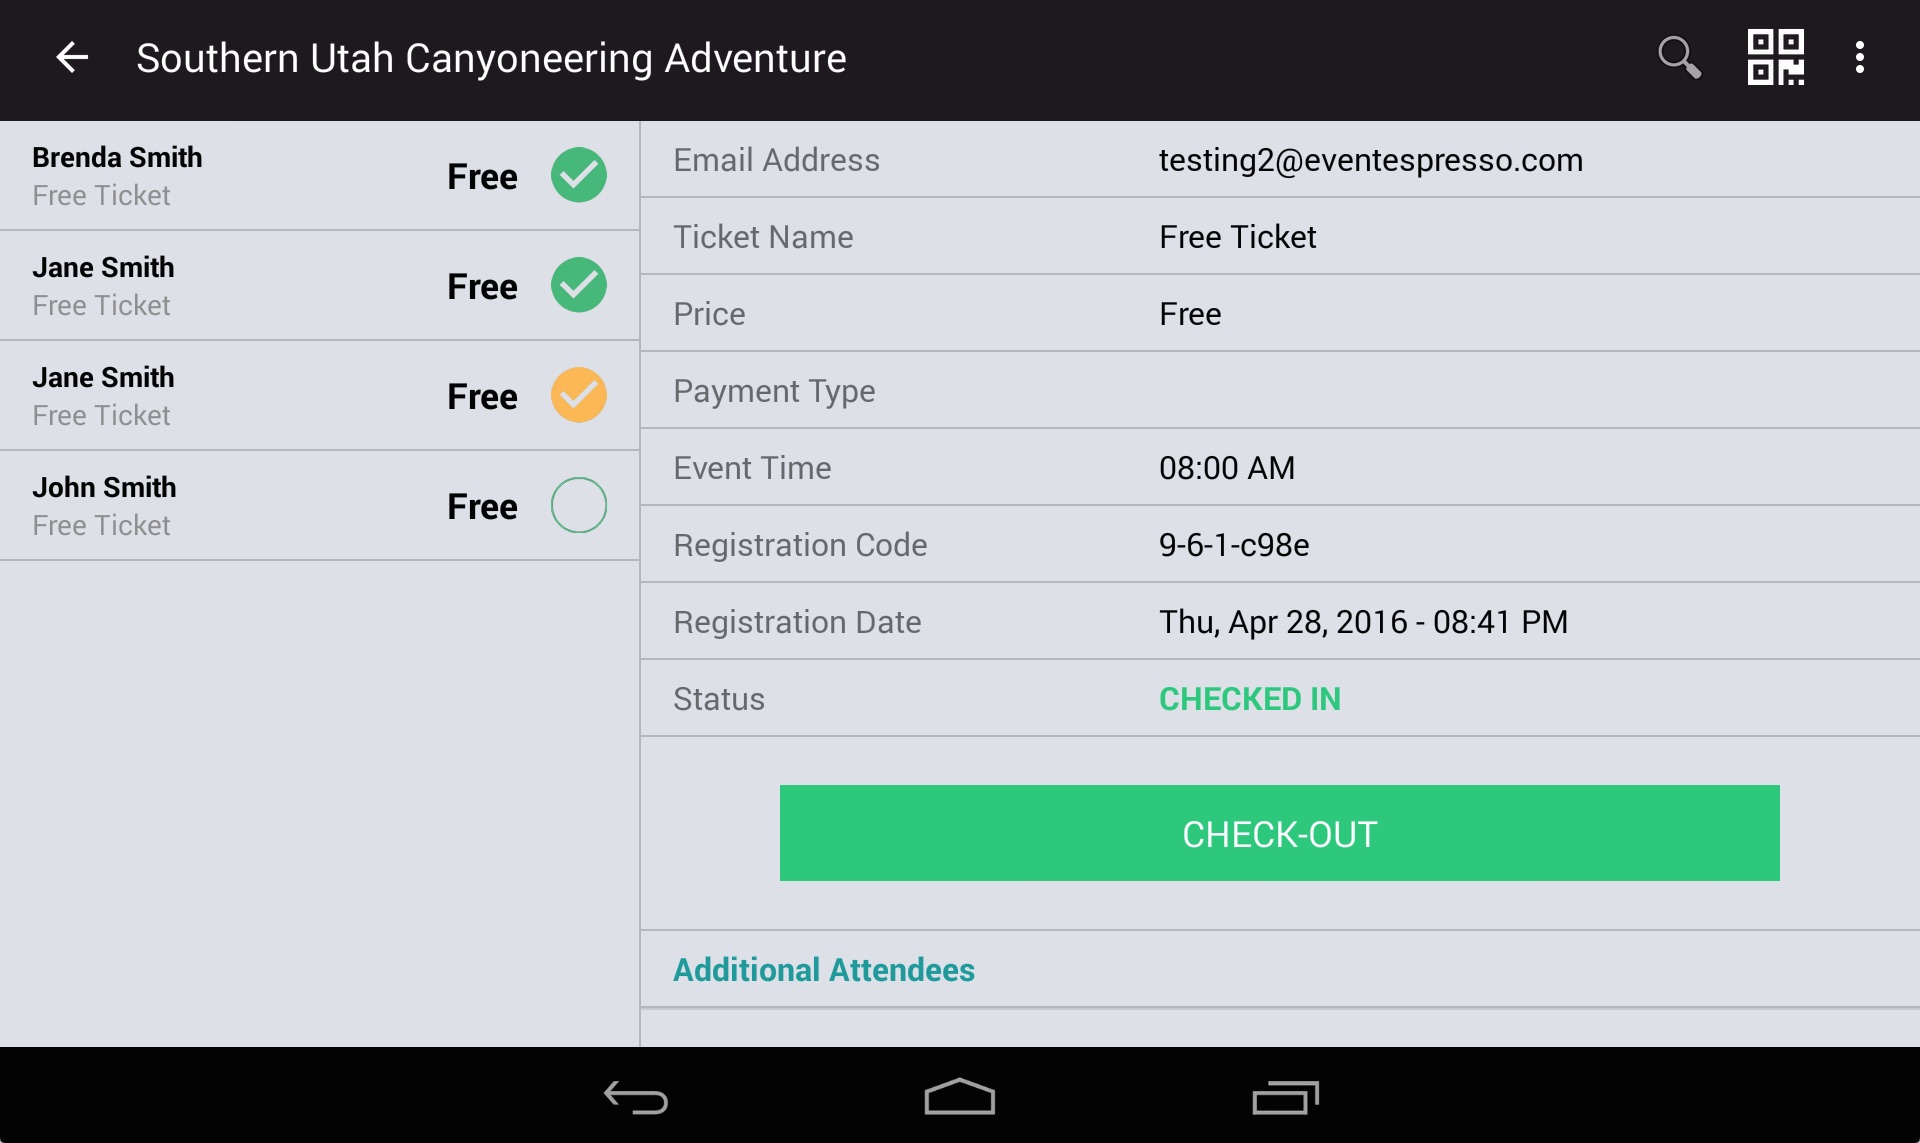
2. You'll then be taken to the Attendee Overview Screen where you can begin manually checking in attendees. Just click on an attendees name and the view will change to show the registration info:
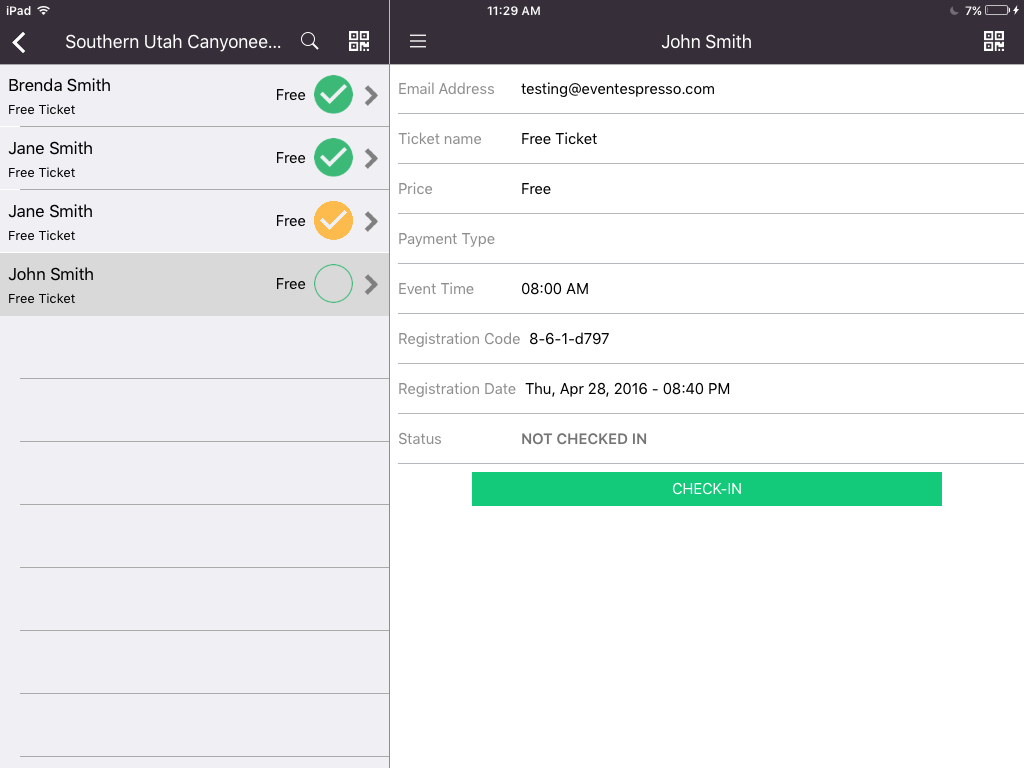
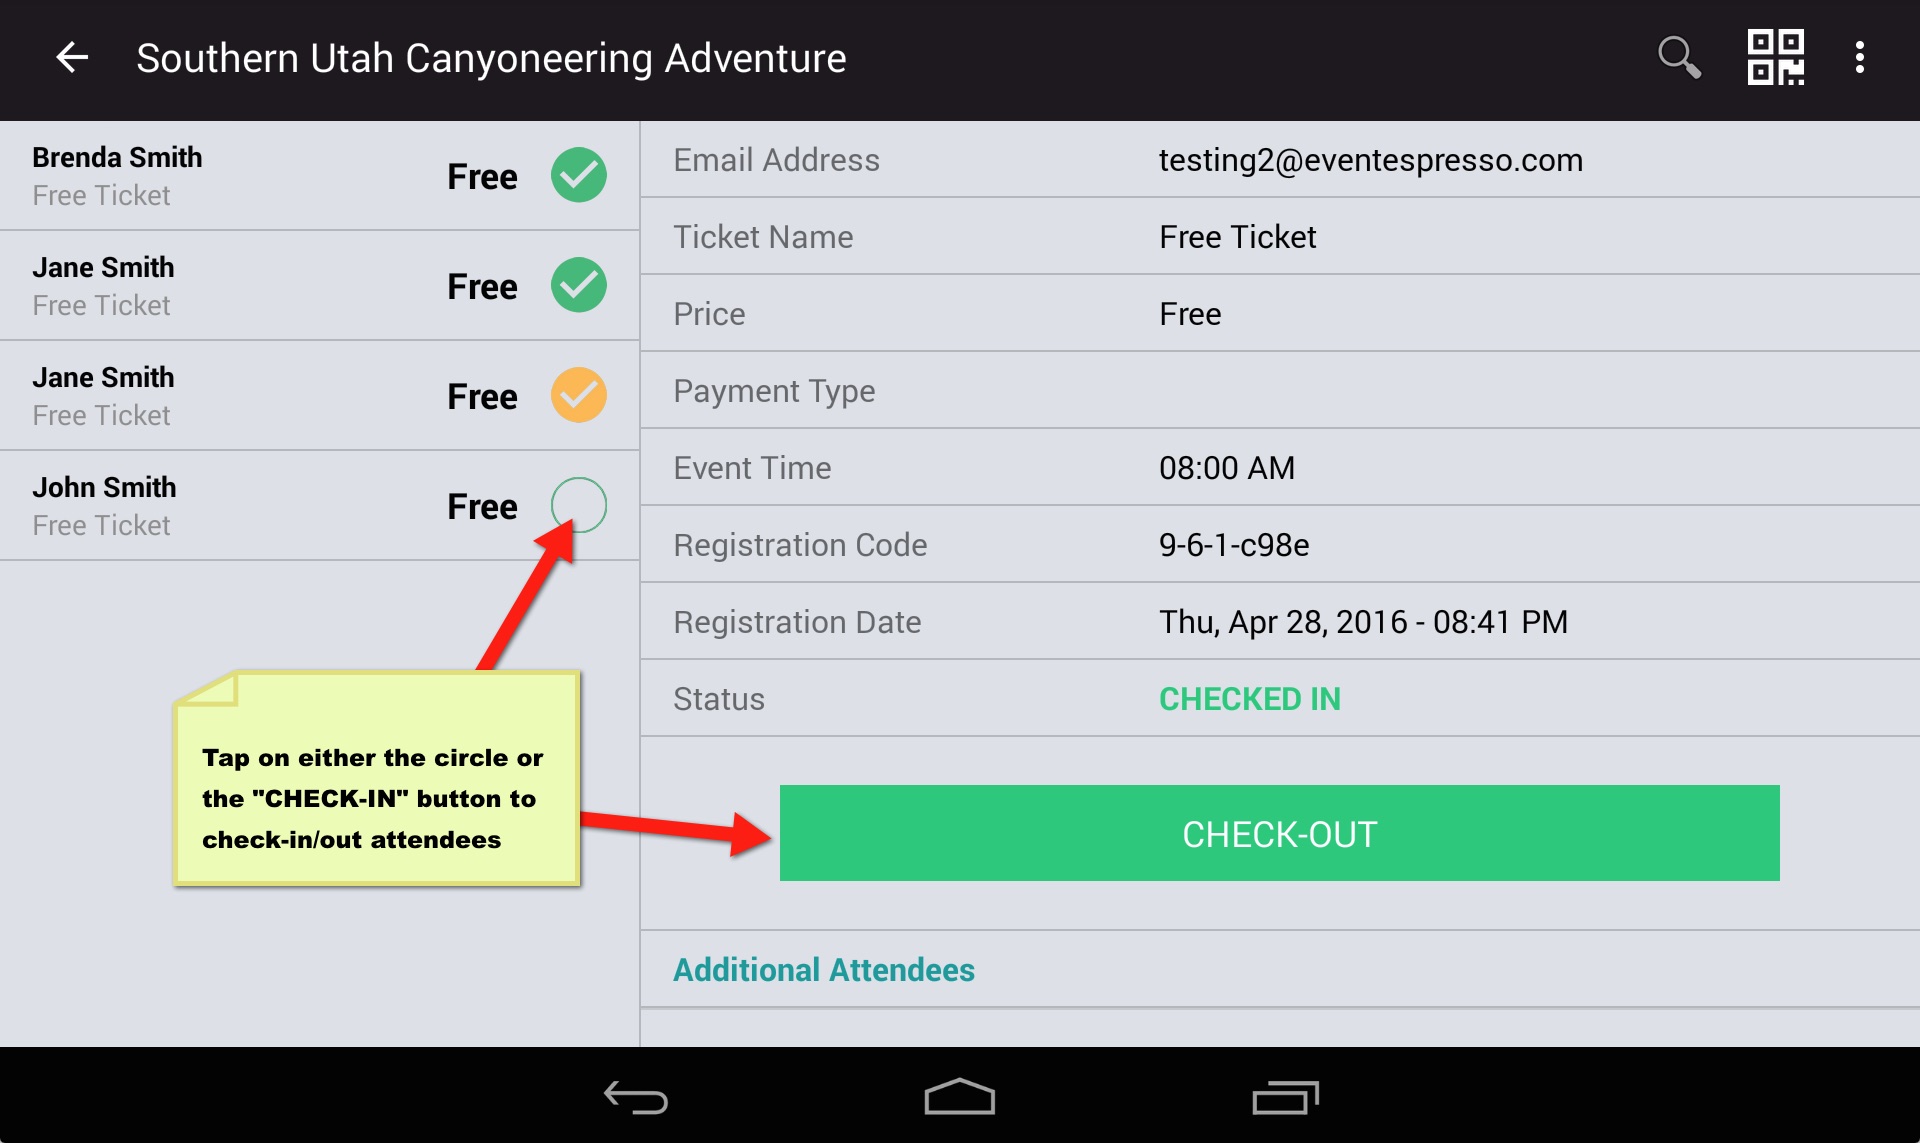
3. Next, tap the Check-in (or Check-out) button in the Attendee Info View or click one of the circles in the Attendee Overview Screen:
 4. When the attendee is successfully checked-in, the "Check-in" button will change to "Check-out" and the "Status" row will change to show the current status.
Attendance Status
The green, yellow, and blank check-mark/circles represent the attendee's current check-in status:
- Green: Checked-in
- Yellow: Checked-out
- No Check-mark: No Check-in Record
Event managers can also login to the website to view attendance records, generate an attendance list and export the list to a report in CSV format.
Manually Refreshing a View
Not seeing recent registrations or newly added events? Just pull down on any view ("Events View", "Attendee View", "Attendee Info View") to refresh.
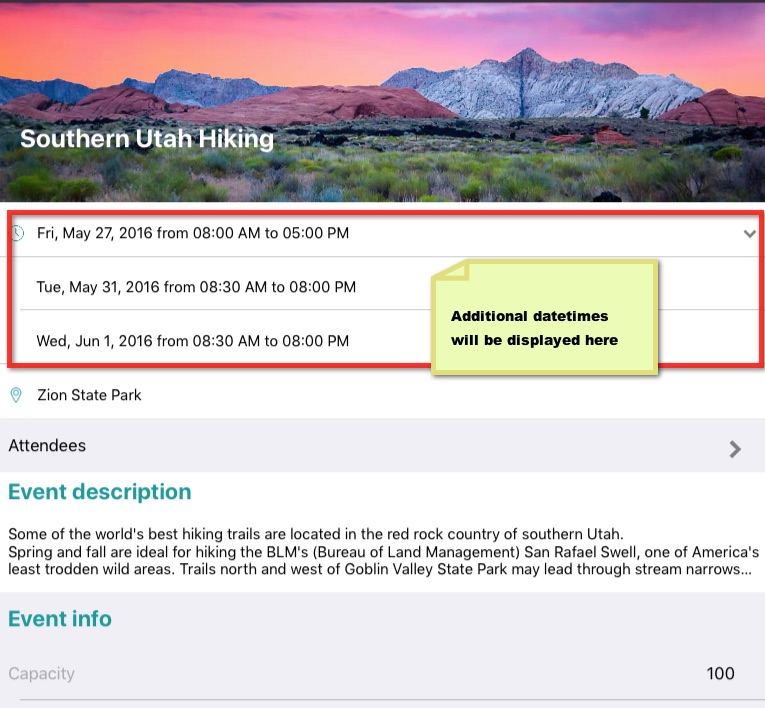
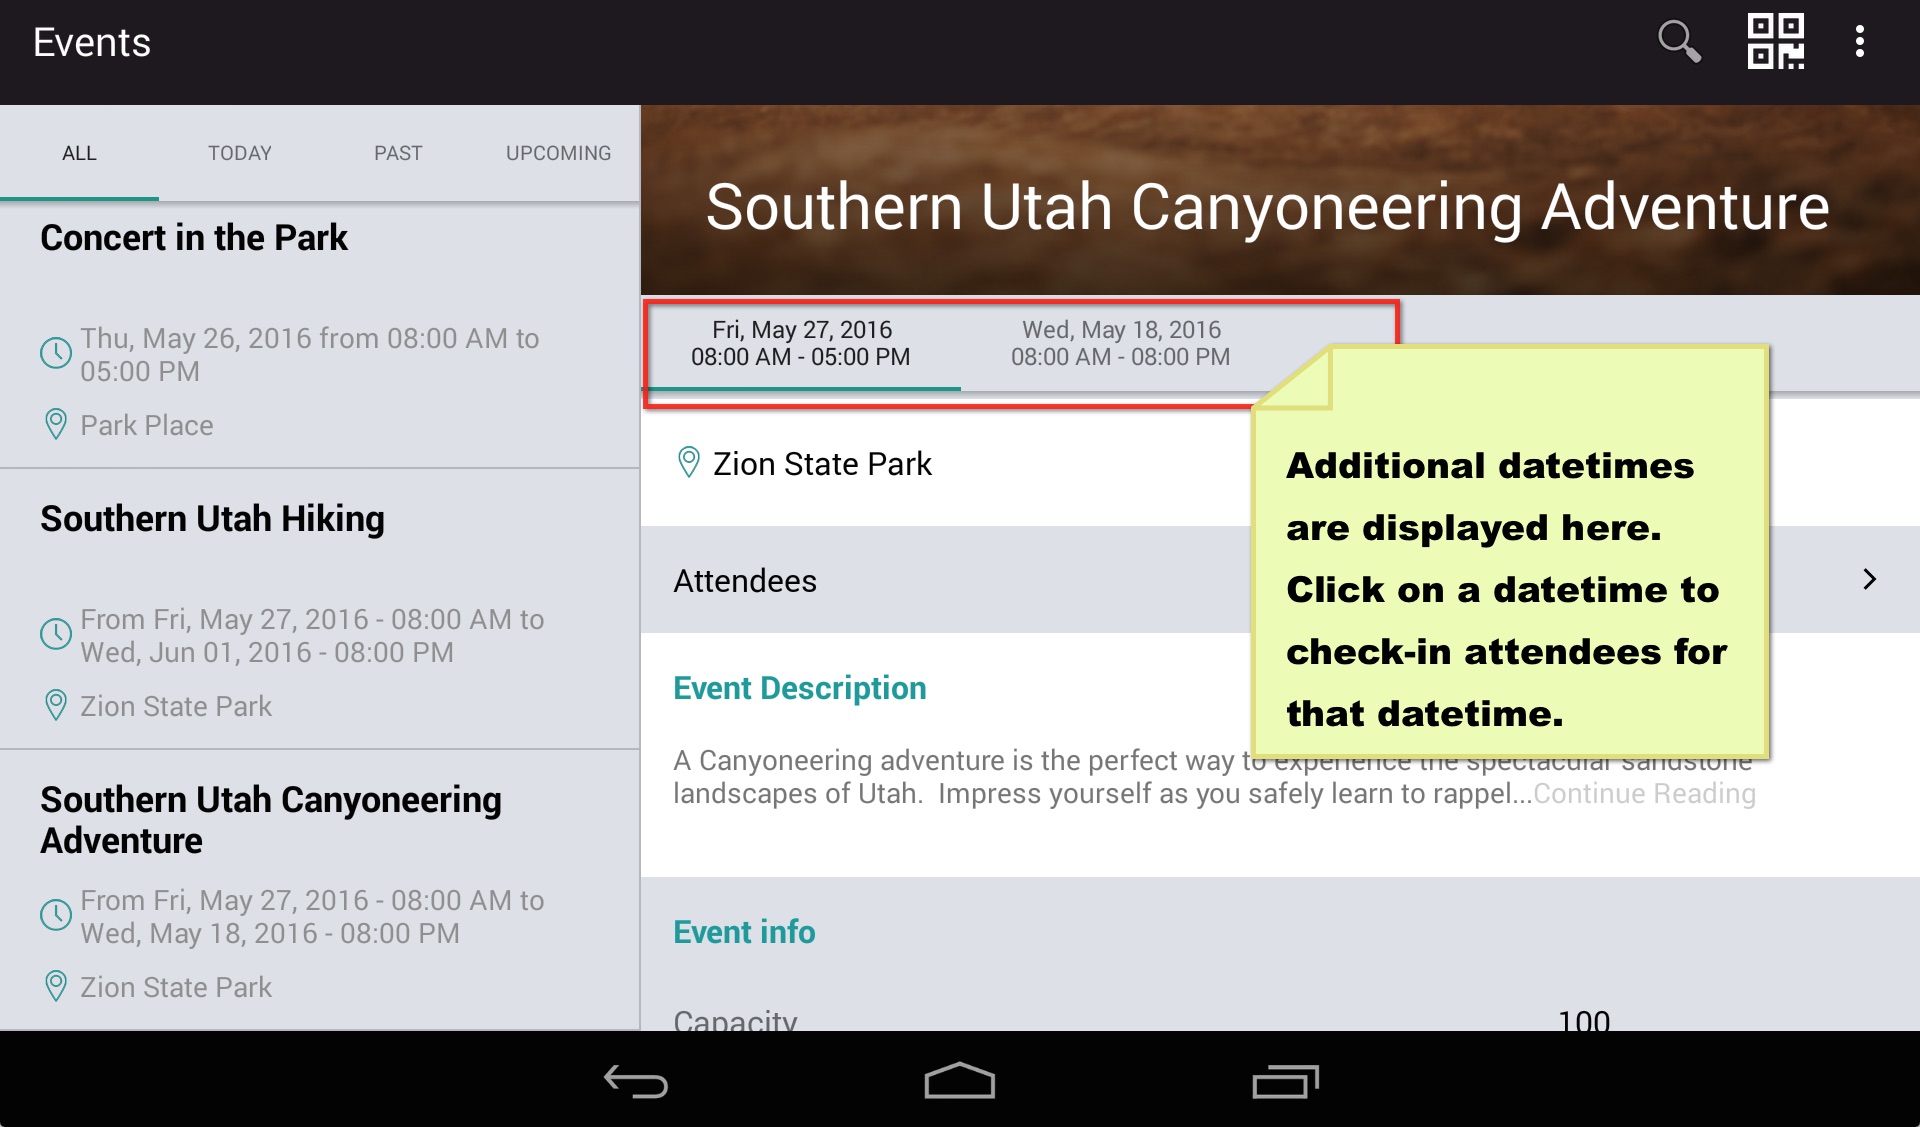
Events with Multiple Datetimes
If you have an event with multiple datetimes assigned to it, you can easily select the desired datetime to check-in attendees. Just tap on the arrow in the datetime row, as shown below:
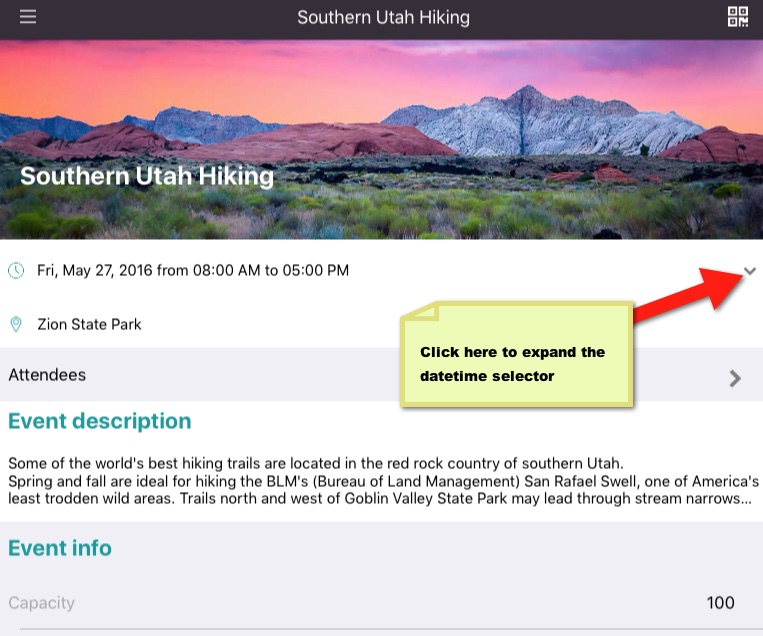
Additional datetimes are displayed under the datetime row. Select the desired datetime to begin checking in attendees.
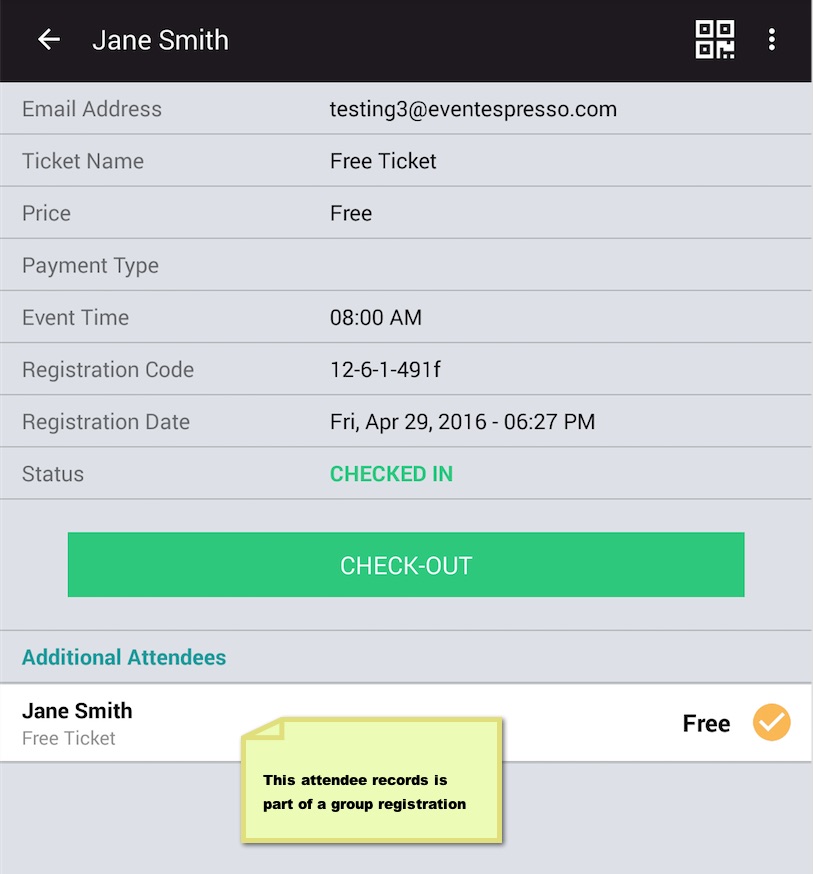
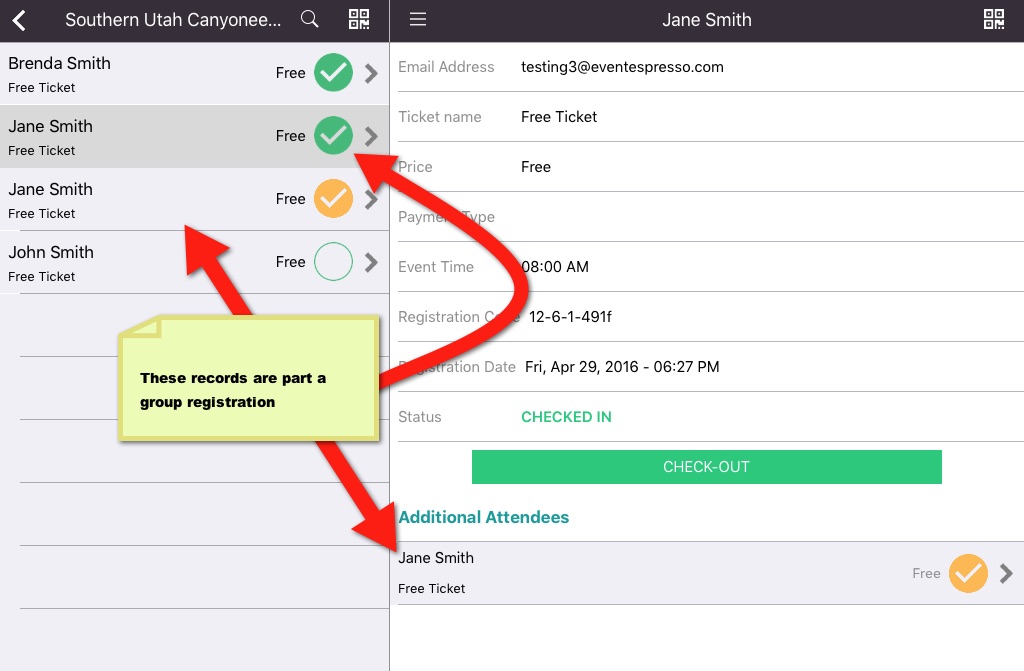
Group Registrations
If you allow multiple people to register for a single event (group registration), the additional, related registrations will be shown below the currently selected registration. The additional registrations can be checked-in independently from within the current record shown on the screen:
Installation for Android Devices
The Event Espresso EE4 mobile event app can be downloaded and installed on your Android devices from the Google Play store:

Logging in
1. Once the app is installed on your iOS device, click on the "Event Espresso" icon.
2. Enter your WordPress login credentials (username & password) into the login screen:

Scanning Tickets
You have two options when scanning tickets. You can scan tickets for a specific event or any event. Please note, the Scanning & Check-in upgrade is required for scanning tickets.
Scanning tickets for a specific event:
With the device is in landscape mode, tap the "Scan" button in the top-right corner of the selected event screen to start scanning tickets for that event.

Scanning tickets for ANY event: For this, you will need to have your device in portrait mode, then click the "Scan" button in the top-left corner of the screen to start scanning tickets for an event.
Next, you will see the "Camera View" within a modal window when the "Scan" button is pressed. Just place the device's camera over the ticket, centered above the bar code or QR Code:
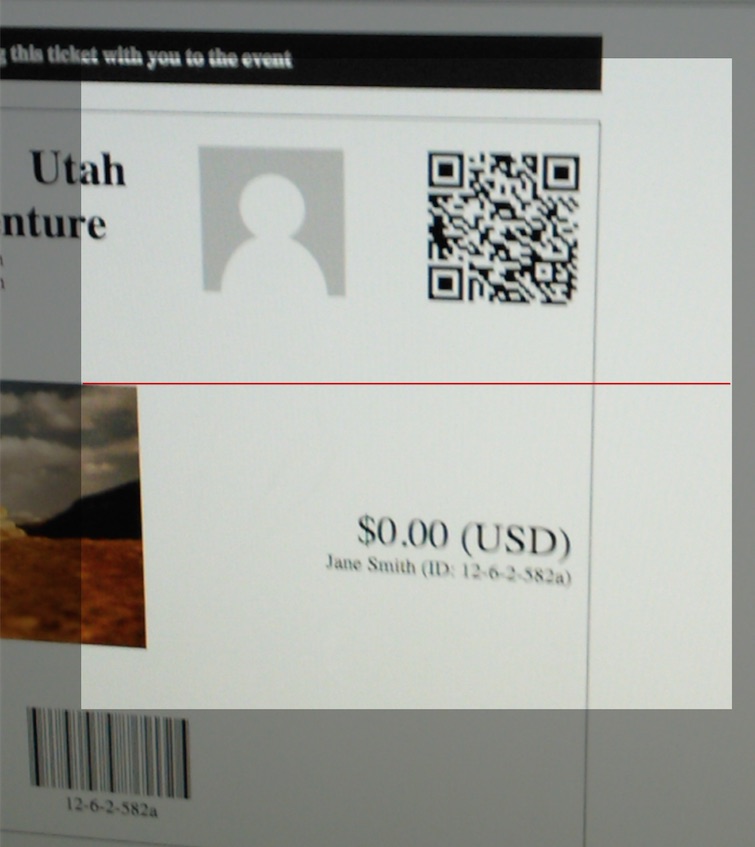
When a ticket is successfully (or unsuccessfully) scanned, the camera view will change to show the info about the attendee and display a green (or a red) image:

Manually Tracking Attendance
Manually Checking In/Out Attendees
1. From the Event Overview Screen, tap the "Attendees" row to view the list of registrations:
2. You'll then be taken to the Attendee Overview Screen where you can begin manually checking in attendees. Just click on an attendees name and the view will change to show the registration info:
3. Next, tap the Check-in (or Check-out) button in the Attendee Info View or click one of the circles in the Attendee Overview Screen:
4. When the attendee is successfully checked-in, the "Check-in" button will change to "Check-out" and the "Status" row will change to show the current status.
Tracking Attendance
The green, yellow, and blank check-mark/circles represent the attendee's current check-in status:
- Green: Checked-in
- Yellow: Checked-out
- No Check-mark: No Check-in Record
Event managers can also login to the website to view attendance records, generate an attendance list and export the list to a report in a .CSV format.
Manually Refreshing a View
Not seeing recent registrations or newly added events? Just pull down on any view ("Events View", "Attendee View", "Attendee Info View") to refresh.
Events with Multiple Datetimes
If you have an event with multiple datetimes assigned to it, you can easily select the desired datetime to check-in attendees. Just tap on the desired datetime in the datetime row, as shown below:
Group Registrations
If you allow multiple people to register for a single event (group registration), the additional, related registrations will be shown below the currently selected registration. The additional registrations can be checked-in independently from within the current record shown on the screen: