Keap (Infusionsoft) Integration
The Infusionsoft integration for Event Smart will transfer your attendee information to Infusionsoft during registration checkout so you can use marketing automation tools through Infusionsoft.
The basic contact information including a name and email address is sent along with their address. The information is stored in Infusionsoft –> Contacts –> General. The address for the registrant is copied to Contacts –> Address and a note is made in Contacts --> Person Notes. An invoice is also created which includes the event name and amount paid.
An active subscription for the Infusionsoft feature upgrade is needed to use Infusionsoft on your Event Smart website.
Locate your credentials for Infusionsoft
2) Look in the top left area of your screen and hover over the Infusionsoft logo and you'll see a menu expand
3) In the lower right area of the expanded menu, under Admin you'll see a Settings link. Go ahead and click on the Settings link under the Admin area.


7) Paste in your Encrypted Key in the field for it.
8) Switch back to your browser tab that has your Infusionsoft dashboard open and look at the web address or URL in your browser. It will appear something like this: abc123.infusionsoft.com. The information before the ".infusionsoft.com" is your Application Name. In this example, the Application Name is abc123. Copy your Application Name.

Accept payments through Infusionsoft
3) Look for the E-commerce menus area and then click on Settings.

4) You'll now see the Product screen. Look for Payment Processing and then click on Merchant Account.

5) The Merchant Accounts screen will display your current merchant account. Look for the one that you want to use and then hover over the Edit link for it
6) Your web browser may display a message in the lower corner of the screen. Towards the end of the information, you'll see a parameter for accountId. The number value for it is your merchant ID. For example, if you see accountId=6, then your Merchant ID is 6. If you are not able to see the information, then copy the Edit link for now.

8) Look in the menus on the left side of the screen and click on Payment Methods. Now look for Infusionsoft and click on it and then click the button to activate it.
9) Scroll down and look for the Merchant ID field and then add in your Merchant ID which is the number that you found in step 6. If you were not able to see your Merchant ID, then you can paste now and the information that was copied in step 6 will appear there. Make a note of the value of your accountId and then remove the existing information and replace it with only the number for your merchant ID.

Tagging Event Attendees
As of version 2.2 of the Infusionsoft add-on, you can easily tag contacts when registering for events, so that registrants that are added to Infusionsoft are tagged when signing up for an event. Since event managers might want to assign event attendees to more than one tag, we've added a way to select for each event from within the event editor (hold the "SHIFT" key on your keyboard to select multiple tags):
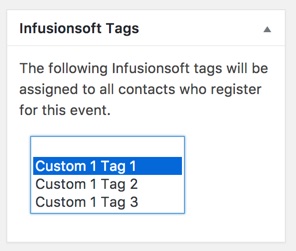
Each new attendee will be tagged with the selected tags for the event. If the contact already exists within your Infusionsoft account, then new tags will be added automatically.
Before using this feature, please make sure you have created custom tags within your Infusionsoft account. For more information about creating tags in Infusionsoft, please open this link:
http://help.infusionsoft.com/userguides/contact-management/search-and-tag-contacts/create-edit-or-delete-a-tag
Conditional Tagging of New Contacts
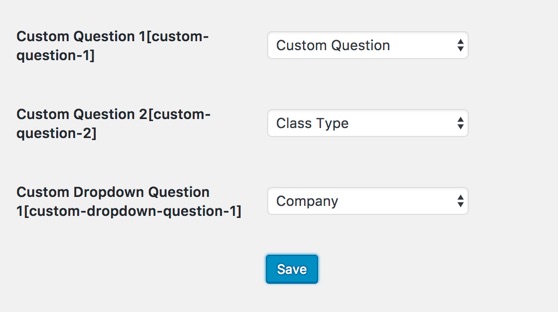
This is done by tagging new contacts with keywords based on selections chosen in your event registration forms. To get started, please make sure you have added at least one Custom Question, assigned it to a question group that is currently assigned to an event. Once you have added custom questions to Event Smart, within the dashboard, visit the Event Smart > Infusionsoft > Conditional Tagging Setup tab. From this tab, you can assign custom registration questions to Infusionsoft tags:

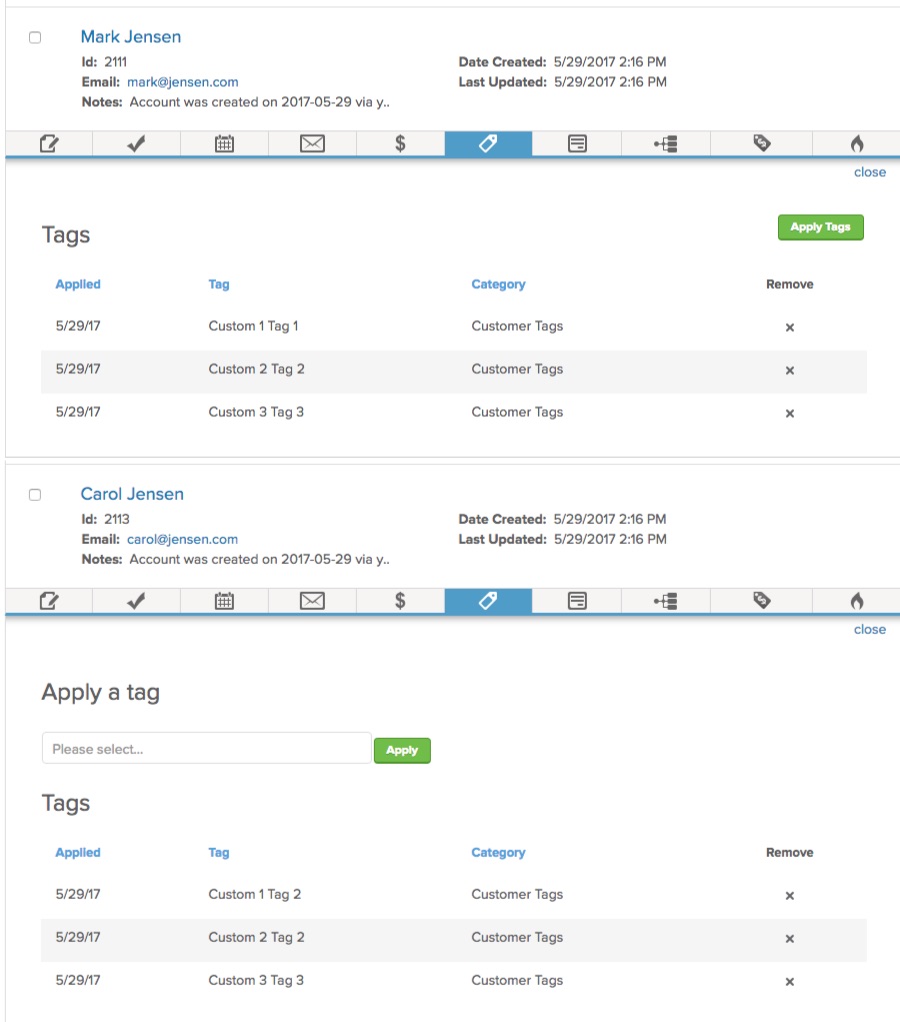
Once the custom questions are assigned to a tag, then someone registers and answers one of the assigned questions, the contact record within Infusionsoft will be updated with the selected tags. Here's an example of what you would see in Infusionsoft when this feature is triggered:
Saving Registration Questions as Standard or Custom Fields
Sometimes you need to save additional information for a contact in Infusionsoft. With the Event Smart Infusionsoft integration, you can save any additional information, from your event registration form, as a standard or custom contact data field, within a contact's record.
Once you have added custom questions to Event Smart, within the dashboard, visit the Event Smart > Infusionsoft > Custom Fields Setup tab. From this tab, you can assign custom registration questions to Infusionsoft tags:
Affiliate Tracking
Tracking affiliate sales using the Event Smart Infusionsoft integration is fairly simple. See information at Infusionsoft about Creating Referral Partners and Referral Tracking Links.
Simple method
The easiest way to track referrals is by appending the URL to your event registration page, with the "ref" URL parameter and the referral partner code or the "affiliate" parameter and the referral partner id.
Examples:
http://www.example.eventsmart.com?ref=johnDoe
http://www.example.eventsmart.com?affiliate=1234