Payment Settings
This section allows you to set which forms of payments will be displayed to a user if the event has a price other than zero.
Payment Methods
This tab shows the core payment gateways and there settings.
Clicking one of the gateways listed at the top shows the individual gateways activation option, and then the settings.
Selecting a Gateway
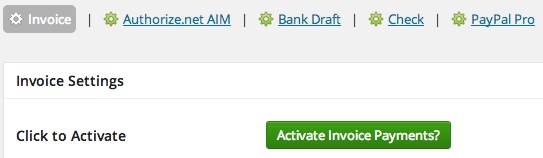
- Set up the payment method by going to Event Smart > Payment Settings.
- Click on your preferred payment gateway. Then click on the green Activate button to activate the payment gateway.
- After activation, you’ll see some settings that will need to be completed. These settings vary between payment gateways. Be sure to save changes by clicking on the Update Settings button.


Common Settings
- Name
The name of the payment method as customers see it in the registration form, in emails, in receipts, etc. - Description
The description of how to use the payment method as customers will see it. This is mostly only seen during registration. - Admin-Only Name
The name of the payment method as seen internally by site administrators and staff. - Admin-Only Description
The description of the payment method as seen internally by site administrators and staff. - Use Paypal Sandbox
Many payment methods have a debug/sandbox mode where payments are not processed but are only simulated. This is helpful when setup and debugging. - Open by Default
If checked, this payment method will be selected by default (assuming no other valid payment methods are also marked as open by default.) - Button URL
The URL of the button image for this payment method in the registration process. You may use any uploaded image on your website (clicknext to the field to select). If left blank, the default button image will be used. - Usable From
Where this payment method can be used from.- Front-end Registration Page: the payment method will appear as an option during the normal registration process to customers and they can use it to process payments.
- Admin Registration Page: when recording payments made from the transaction admin page, the payment method will appear as an option. Note: currently payments can only be RECORDED from the admin, they cannot be PROCESSED.
- Reorder Payment Methods on the Payment Page
Each payment method can be given a numerical number which prioritizes the order it is displayed among other payment methods on the Payment Options screen. Lower numbers are shown first.
So, in case you have multiple payment methods activated at the same time (e.g. PayPal, Invoice, Stripe, etc.), you can decide which payment method is displayed first. This can help you encourage your audience to choose one payment method over another payment method.


Recommendations
Want to see a tour of this screen? Click on the Payment Methods Overview Tour button which appears on the right side of the page.
To learn more about the options on this page, take a look at the different tabs that appear on the left side of the page.
Screen Options
You can customize the information that is shown on this page by toggling the Screen Options tab. Then you can add or remove checkmarks to hide or show certain content.
Settings
This tab controls site wide gateway settings that span across different gateways.
Allow Payment-retry for Pending and Deferred Payments
If a payment is marked as ‘Pending Payment’, or if payment is deferred (ie, an offline gateway like Check, Bank, or Invoice is used), then give registrants the option to retry payment.