How do I change my country and currency settings?
In this guide, we’ll learn how to adjust the countries that are used in the country drop-down menus for Event Smart. Additionally, we’ll cover how to add additional provinces/states for a country that does not already include them. First log in to your Event Smart admin. Next, locate Event Smart in the Event Smart admin menus and then click on General Settings. Next, click on the Countries tab. You’ll now be viewing the Countries and States/Provinces screen. In this screen you can make various changes to your country settings and respective province/state. By default Event Smart comes with the United States and its states enabled along with Canada and its provinces enabled so this screen may be especially useful to you if you are hosting events in a different country.

Adjust the Countries that are Available in the Country Dropdown
To remove a country from the country dropdown, first select it using the Select Country drop-down menu. Then just under the Country Details section you’ll see an option for Country Appears in Dropdown Select Lists. If you would like to remove a country, set the option to No and then scroll down to the bottom of the page and click on the Save Country Details button. To add a country, you’ll follow the steps above up until the Country Appears in Dropdown Select Lists option. You’ll then select Yes (to enable this country) and then scroll down to the bottom of the page and click on Save Country Details.

Adjust the States/Provinces that are Available in the State/Province Dropdown
You can access the states/provinces for various countries in a similar manner. First you’ll need to select your country using the Select Country drop-down menu. Then towards the right side of the screen you’ll see a section for States/Provinces. These are currently included for the United States and Canada. Information for other countries are in the works. If your country is missing information, then you can easily add it. The format should be: Code = Abbreviation Name = State/Province Here is an example for Australia:
ACT Australian Capital Territory 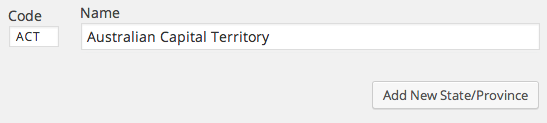
After entering the information, be sure to click on the Add New State/Province button. Similar to the Country dropdown select list, you can enable or disable certain states/provinces for the state/province dropdown list. Just locate your state/province in your list and select Yes or No. Then scroll down and click on Save States/Provinces.
Changing Your Organization Country to Change the Currency
IMPORTANT: In the General Settings > Your Organization, please be sure to select the Country of where your business is located/registered, as this setting affects the currency that is displayed throughout your website. This also affects the currency that will be used when accepting payments for registration.