Handheld Barcode Ticket Scanning
The Event Smart Barcode Scanner is great for checking-in attendees the door of your classes and events. Just plugin your handheld scanner to your desktop or laptop computer and easily start scanning tickets at the door, right from your Event Smart admin.
Don’t have a barcode scanner? No problem. They are fairly inexpensive and easy to use. You can pick one up on Amazon.com for around $25 to $99. Some beta users have picked up bluetooth barcode scanners to allow attendee look-up and scanning using a mobile device. If you plan on allowing attendees to display tickets on their mobile devices, you need to purchase a 2D barcode scanner.
An active subscription for the Barcode Scanning feature upgrade is needed to scan tickets for your guests on your Event Smart website.
It is also included in the personal or business plans. Want to upgrade to one of these plans? Make the switch from your My Account page on EventSmart.com.
Getting Started
Step 1 – Add the Barcode Scanning subscription to your Event Smart account.
Step 2 – Once installed, navigate to your Dashboard > Event Smart > Scanning to find the event that you need to manage. The list below will only show events that are published or private, Draft status pages will not show in the drop-down selection list.

Step 3 -Decide whether or not you want to continuously scan attendees or look-up each attendee profile then manually check them in.
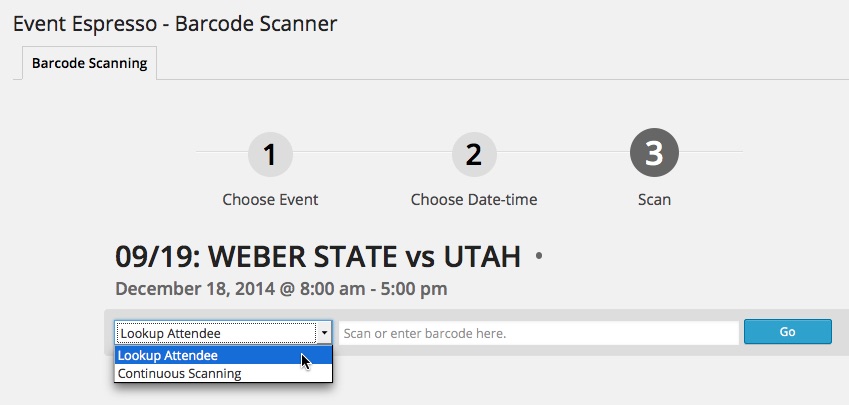
Step 4 – Once you’ve selected your event from the dropdown, use your mouse (or finger if using a mobile device) to select the field labeled “Scan or enter barcode here”, which listens for and reads the scanned barcodes.

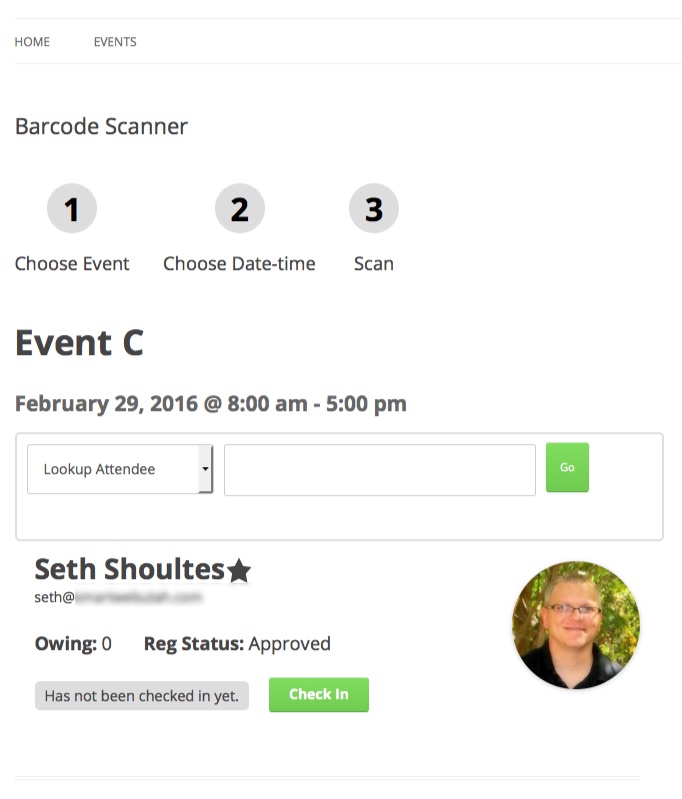
Step 5 – Scan a ticket! This is the fun part. Make sure your handheld scanner is plugged-in to your computer (or connected via bluetooth to your mobile device), then grab a ticket you’ve printed and scan it. If everything works correctly, the scanner should read the bar code and populate the text field with a number/text string that will automatically check-in or display an attendees information.

That’s it. You are now ready to checking-in people at the door.
Front-end Ticket Scanning Page
Tickets can be scanned from any page of your website by adding this shortcode to any WordPress page:
[ESPRESSO_BARCODE_SCANNER]
Please make sure the page is password protected, or set to private to keep unwanted visitors from attempting to check themselves in to your events. See our note about permissions below.
Note About Permissions: If the barcode scanner is loaded via the admin page, then we do a capability check to see if the user has has access before allowing any action to be done on the scanner (or to even show the scanner form). When this is used on a front facing page via a shortcode that capability check is completely removed, but it defaults to no capability check because that makes it easier for Event Admin’s to implement by just putting the barcode scanner on a password protected page.
Note About Hardware:
It is important that you know the differences between barcode scanners before making a barcode scanner purchase. We have confirmed that the some of the less expensive laser scanners cannot scan codes that are on mobile phone screens. If you plan on allowing attendees to display tickets on their mobile devices, you need to purchase a 2D barcode scanner