Messaging System: Overview
With the Messages system, you can monitor and control your Messages Activity, and modify your message templates either globally or for individual events. and enable/disable individual messages types.
A subscription to either the Customizable Confirmation Emails or Customizable Tickets and Confirmation Emails, plus Check-in Tracking feature upgrade is needed to use custom messages on your Event Smart website.
It is also included in the personal or business plans. Want to upgrade to one of these plans? Make the switch from your My Account page on EventSmart.com.
Messages Activity
The Messages Activity tab gives you the ability to monitor the activity of your messages. This gives you a lot of confidence to understand the status of your messages and keep in good contact with your audiences.
You’ll be able to see what messages were sent, queued to be generated or sent or re-sent, which failed and can be re-tried, etc. You can also trigger an action like generate the message immediately or send the message immediately.
This new system tracks and prioritizes when messages are generated and when they are sent. When messages are triggered, they are no longer generated immediately and sent on the same request. Instead, they enter into a queue and all processing happens on separate requests. This makes your registration process faster for your audience, especially when processing more registrations at the same time. This also paves the way for new features like automated email/message reminders, etc. 👍
All outgoing messages will still be delivered as expected. However, with the new message queue system, you can now track the status of all outgoing/sent messages, and resend previously sent messages.
Messages Activity records are retained for 24 months and then deleted.
 The messages are grouped into several groups according to a process flow: Generation > Sending
- All - all message actions
- Sent - the number of actual messages that have been sent
- Queued for Generation - less urgent emails are generated a few minutes after registration (instead of immediately). After a message is generated, it is then queued for sending. A single message may generate several messages for sending. For example, a Registration Approved Message may generate three emails (Event Admin, Primary Registrant, Registrant).
- Queued for Sending - these messages are ready to be sent when its schedule kids in or when the server is available. This usually happens within 5-10 minutes.
- Queued for Resending - these are messages that you have manually queued to be re-sent using the circular arrows icon in the Actions column.
- Failed Sending, Can Be Retried - these are messages that failed to send and you can re-trigger the sending using the circular arros icon in the Actions column.
- Failed Sending - these messages are unable to be generated or sent because there is no data for that message. Check the related transactions to determine if there are any problems with the data.
Message Activity – Actions
The actions column gives you the option to: generate a message now, send messages immediately (if queued), resend messages, view transactions, and view failed messages, view messages and more.
Message Types
One of the main ways of looking at the messaging system, is to consider the messages as groups of emails that are sent at a particular point. For example, the Payment Reminder message, will send 2 emails, one to the admin and one to the Primary attendee. Whereas the Registration message will send 3+ emails, one to the admin, one to the primary attendee and one to each of the additional attendees.
Overview
The default messages consist of:
- Resend Registration – a reminder email regarding the registration.
- Payment Reminder – a reminder email regarding payment.
- Registration – the initial registration email.
- Payment – the initial payment confirmation email.
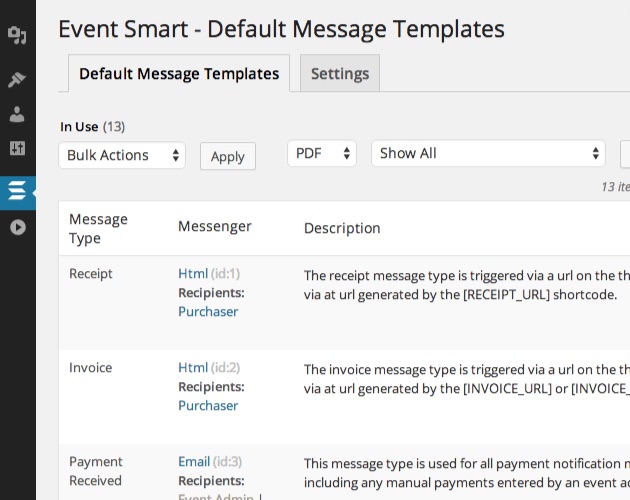
The overview list shows various bits of information about the messages:
- Event – the type of event that this message is triggered on.
- Message Type – The name of the message.
- Messenger – This is important and is where you access the various emails attached to the message type. Clicking the Email link, will always show the default admin email. Clicking the Event Admin, Primary Attendee or Attendee links will show the appropriate emails for those people.
Settings
On its first activation, Event Smart will automatically setup the core messenger (email) and message types (registration and payment).

Activating / Deactivating Message Types
There may be times where you want to deactivate (or activate new) Message Types for a particular messenger. The messages system makes it easy to do so. To deactivate a Message Type, drag the message type box from the "active area" into the "inactive" area in the right sidebar. To re-activate, simply reverse your steps. Remember that when you deactivate a message type, if that message type has any settings, the settings will be lost. However, any message templates that match the messenger and message type you deactivated will be preserved, they are just marked "inactive" in the database.
Activating / Deactivating Messengers
You can select Messengers via the tabs across the top of the settings page. The available messengers you see depends on what version of Event Smart you have and what upgrades are installed. Every install include an "Email" messenger tab. When you click one of those tabs it will display that messenger.
Although customizations made to global templates are preserved when a messenger is deactivated, any settings for that messenger (or the message types that were attached to it) are lost on deactivation. Also, once you deactivate a messenger, no more messages will be delivered using that messenger for any of your events.
Edit Message Template
This is the heart of the individual emails. From here you can customize the email to be perfect for your recipient.

In the top left of the page is a drop down box where you can easily swap between the different emails within this message group. Remember to save any changes before swapping!
There is also a Preview button to show you a mock-up of how the email will appear to most people (note this will never be 100% accurate due to some users that do not display images in their emails).
Messages Shortcodes can be used in all the fields on the edit message template page .

Valid Shortcodes – These shortcodes insert various information into the emails. Only usable in messages, not in events.
To – Required. Who the email will be sent to, you can use the shortcodes here or enter a direct email address.
From – Required. Who the email is coming from, you can use the shortcodes here or enter a direct email address.
Subject – The subject line of the email, shortcodes can also be used here.
Attendee List – Currently only available on Admin related emails. Here you can style how the attendee data is shown to the admin. Shortcodes can be used here.
Event List – This section creates the content for the [EVENT_LIST] message shortcode, which is normally added to the Main Content section.
Main Content – This section is where you can add the non-event information, such as company branding, contact information etc. The event related data can be inserted via the messaging [EVENT_LIST] shortcode.
 Update Actions
- Override all custom – override all customizations (proceed with caution when using this).
- Save and Close – save your changes and return to the Messages Overview.
- Save – save your changes and stay on the same page.
- To – Who to send the test email to.
- Reset Templates – reset the message template back to the default settings and content.
- Test Send – sends a test email to the email address in the To field.
Email "From:" and "Reply-To:"
Email providers often block messages that appear to come from their domains but aren’t sent through their servers. This helps protect users from spoofing and unauthorized senders. For example, sending an email from EventSmart.com using a Yahoo address like example@yahoo.com as the “From” address is likely to be rejected.
To improve deliverability, we require one of two things:
- White Labeling Event Smart with a Custom Domain and Email Address
- Using an Event Smart email address as the sender and setting the event organizer’s email as the “Reply-To.” This ensures emails are delivered while still allowing attendees to reply directly to the organizer. This is currently the default.
"From: EventSmart.com <orders@eventsmart.com"
The best way to ensure that your emails are genuine, authorized, and there by delivery, is to have all transactional event emails to be sent from the Event Smart servers, e.g. " From: EventSmart.com <orders@eventsmart.com".
This setting cannot be changed and helps to ensure your emails have the best chance to be delivered properly. See also.
"Reply-To: Site Owner/Event Author"
Your customers can reply to you directly, even though the sender is Event Smart, because the "Reply-To:" address will be the email address of the event author or organization. So, whenever a customer tries to reply to an email that is sent from Event Smart, you will get the reply directly to the email address you provided for the organization or the event author.
Next: Message Templates