Customized Confirmation Emails
In Event Smart implemented a system we call “Messages”. This system is very powerful (somewhat complex), and can be extendable and used for more than just email.
Messengers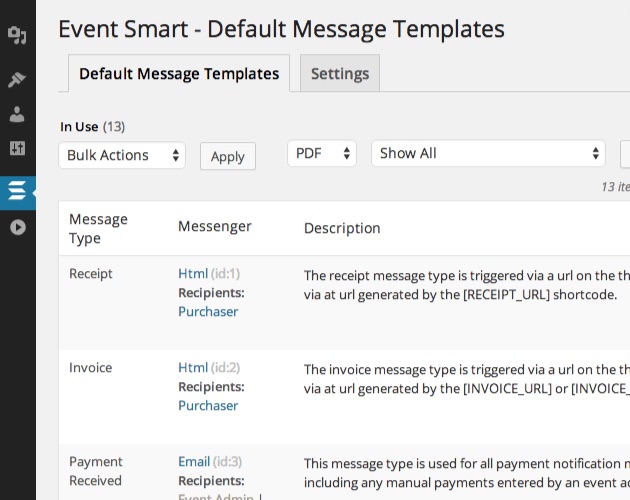

Messengers will handle the delivery of messages. Hovering over the Messenger will provide you with an additional option to Edit the current message template. Clicking on Email will take you to the Message Templates Editor so you can edit the message template for an Event Admin or Primary Registrant (first person registered among a group) or Registrant.
Each message type can be turned off, as well as different recipients (e.g. admins or registrants) can be turned off for different contexts. For example, you might only want Primary Registrants (first registrant among the group) to receive a Payment Reminder message instead of all the attendees that were registered together under that person.
Messages Settings
 In the case that you don’t want to send all the messages for all the different contexts (see below), the Messages Settings page allows you to set a certain message contact active or inactive (turn it off or on, by message type).
Default Confirmation Messages
Event Smart has default confirmation emails for different contexts:
- Registration Approved
This message type is for messages sent to attendees when their registration status is set to Approved. - Registration Pending Payment
This message type is for used for recipients who have a “Pending Payment” registration status. - Not Approved Registration
This message type is for messages sent to registrants when their registration status is set to “Not Approved”. - Registration Declined
This message type is used for all declined payment notification messages that go out including any manual payments entered by an event administrator. - Registration Cancelled
This message type is for messages sent to registrants when their registration is cancelled. - Payment Received
This message type is used for all payment notification messages that go out, including any manual payments entered by an event administrator. - Payment Reminder
This message type is used for all payment reminder messages. These messages are triggered when an offline gateway registration is submitted or when manually triggered via event administrators via the Transactions admin page(s). - Payment Declined
This message type is used for all declined payment notification messages that go out, including any manual payments entered by an event administrator. - Refund Issued
This message type is used for all payment notification messages that go out for refunds. - Receipt
The receipt message type is triggered via a url on the thank you page and via at url generated by the [RECEIPT_URL] shortcode. - Invoice
The invoice message type is triggered via a url on the thank you page and via at url generated by the [INVOICE_URL] or [INVOICE_LINK] shortcode. - Newsletter
Newsletter message types are triggered manually by the admin for sending mass email to select groups of registrants. - Ticket
The ticket message type is used for generating and displaying tickets. The templates are triggered by url path.
With the right plan, you can create custom message templates, or a custom Invoice template anytime. Just click the button next to the Invoice or Message row:

2) The custom template will not be used anywhere by default, so you're free to experiment. If you edit the default template then that template will be used everywhere by default.
3) You can preview changes you make, but understand that the form would need a real situation to retrieve the real data.
4) You can assign this new custom invoice template to an event and then open the invoice for an attendee to see what it would look like. You can choose for an event to use a new template by going to the Notifications settings panel, HTML tab, and choosing the name of the new template you created:

See also Messaging System: Message Templates
We recommend that you:
- Create and experiment with a custom template
- Edit and select a custom template for an event, look at the invoice or email for an existing attendee for an event to see the live data in the new template.
- Then if desired, edit the default template or use the new custom template for new events going forward.